How to install Google Camera on any Android Smartphone
Updated atHow to Install Google Camera on Any Android Phone to Improve Photo Quality
Introduction
Hello readers who love the art of photography on the Android operating system! In today's technological age, owning a quality camera application is undeniable for mobile phone users. Among the featured apps, Google Camera (GCam) is known for its excellent photography features, however, for those who don't use Google phones, installing GCam can be a challenge. .
But don't worry, we have a way to overcome this! In this article, I will guide you step by step on how to install Google Camera on any Android phone, helping you experience the unique features and excellent photo quality of this application.
From finding the compatible version to successfully installing it on your device, everything will be guided in detail. Let's explore together and enhance your Android phone photography experience!
Step 1: Find a compatible GCam version
- To start the GCam installation process, you need to find the app version that is compatible with your mobile device. You can search for the GCam version on the developer forums or use the Gcamator app. This app will automatically detect your device and provide a compatible GCam version.
Step 2: Prepare your mobile phone
- Before installing apps from unknown sources, make sure you have enabled the "Install apps from unknown sources" option or similar option on your mobile phone. This will allow you to install apps that are not from the Google Play Store.
Step 3: Install the GCam application
- Once you've found a compatible version of GCam, you can download the APK file and install the app on your mobile phone. Make sure that you have enabled API 2 for the camera on your phone. API 2 is an option that allows third-party camera apps to work properly and optimally on your phone.
Step 4: Enjoy Google Camera
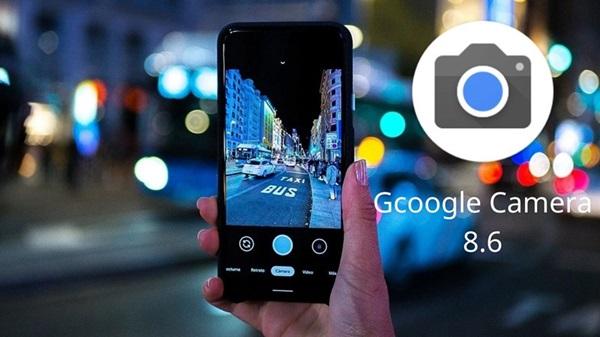
- After successfully installing GCam on your phone, you are ready to enjoy the features and great photo quality that this application has to offer. GCam typically offers HDR+ photography, Night Sight, and many other innovative features to enhance your photography experience.
Important Notes
- Before proceeding to install any application from unknown sources, consider and ensure that you understand the possible risks and perform a safe installation process. Installing GCam from an unofficial source may have potential security and stability issues. If you are not confident about the installation process or cannot find the right version of GCam for your phone, seek support from the developer community.
- In case the Gcamator app cannot find a compatible version for your phone, try contacting the developer directly or seek information from other trusted sources.
- With the successful installation of GCam on your mobile phone, you are ready to enhance your photography experience and explore the innovative features of this Google camera app.
Instructions for using Google Camera
Below is a detailed guide on how to use Google Camera so you can fully enjoy the possibilities this application offers.

Step 1: Open Google Camera App
- First, open the Google Camera app on your phone. You may recognize the iconic Google Camera logo, a sophisticated multi-eye camera.
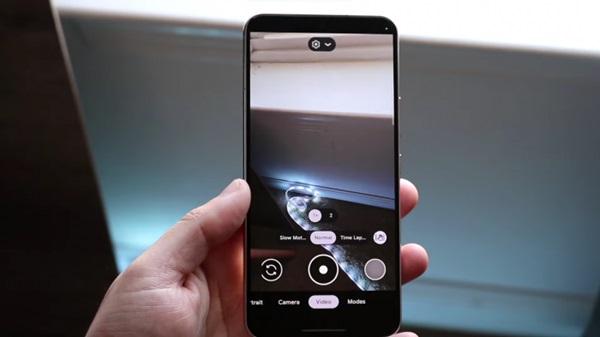
Step 2: Learn the Main Interface
- GCam's main interface is usually quite simple but powerful. At the bottom, you'll see the main photography options, including photo capture, video recording, and photo mode. Play around with these options to get familiar with how they work.
Step 3: Enjoy HDR+ and Night Vision
- Google Camera is famous for its HDR+ and Night Sight features. In shooting mode, you will see the "HDR+" icon in the upper left corner. Turn this feature on to increase the detail and style of your photos. For night photography, choose "Night Sight" mode for great photos in low light conditions.
Step 4: Use Advanced Settings Options
- In the settings, you will find many options to fine-tune your photography experience. You can configure photo size, video quality, and even RAW capture options for great flexibility.
Step 5: Use the Quick Focus and Auto Focus Interface
- During shooting, use the quick capture interface to quickly capture the moment. At the same time, GCam's autofocus feature helps you take sharp photos without having to worry about adjusting focus.
Step 6: Explore More Features and Share Photos
- Finally, take the time to explore other features like Panorama, Lens Blur, and other effects. Once you have the photo you like, don't forget to share it with your friends and family!
Conclusion
Finally, successfully installing Google Camera on your Android phone not only opens up a new world of photography experiences, but is also an important stepping stone to making your photos more vivid. With features like HDR+, Night Vision and many other improvements, GCam is truly a great assistant for photography lovers.
If you encounter any problems during installation, seek help from the developer community. Let's explore and enjoy the special moments that GCam brings on our Android phones!


1. This is the safest site on the Internet to download APK. 2. Don't ask about the Play Protect warning, we've explained it well, check here. 3. Do not spam, be polite and careful with your words.